Sunday 21 December 2014

December tag - Frosty

Hi Everyone,

Well another year is fast closing on us, and I have all 12 Tims Tags completed once more for 2014. I really loved Tim's tag this month which can be viewed together with his brilliant step by step Here.
Below is my take on it:

 I must admit I did have a struggle this month with the snowy technique on the background and I finally got it on my third attempt.  I did not have the frosted but I did have the frosted film so I had to comprimise by sticking on to very thin acetate and running this through the sun rays embossing folder

 
I dont have the wording dies in my stash yet either so my JOY wording was cut on my cricut from a piece of whitewash cordinations card.  The embossed frosted film was stitched onto the tag with my sewing machine and I then realised that the wording should have been underneath! whoops to late, so it was stitched on top,I actually quite like it.
 
 
I sketched lightly around the wording with a pencil to make it pop a little. An old Christmas muse token was attached to the top using pine twine and a gumdrop in the centre.
 
 
The reindeer was painted and inked as Tim explains in his post and then I used glue and seal and rock candy over and vintage photo distress glitter sprinkled on it to add interest and depth. Pine twine held the bell in place around his neck.  The snowflake was coloured with various distress spray stains and then I took Picket fence paint to pick up the detail of the embossed areas.  Th edges were inked and pumice stone glitter scattered over it.  

 
I spray coloured glittered and dabbed paint on the tips of the die cut holiday greens


 An industrious metal trim was added to the bottom of the tag


Another look at the completed tag.
Also I have my matching atc for my tray which of course is now completed
 
 
I love the completed atc tray what a lovely display of all those fabulous Timmy techniques
 
 
 I wish all my followers old and new a very Happy Christmas
and very best Wishes for 2015
Mo xx 
   

Friday 19 December 2014

A special gift - Christmas House

Hi Everyone,

I hope your Christmas preparations are going to plan, not many sleeps to go now!!  I am showing off a little today but not with my own work.  I had a lovely visit from my bestie Anne aka Redanne and  her hubby David last Monday and she brought me a gift that truly deserved a post all of its own to show it off.  Anne made a little Christmas house  to raise money for a local school and I was lucky enough to see it before it went, needless to say it was love at first sight (as are most of Anne's 3d projects) but I think she noticed I could not take my eyes of this house.  You can see Anne's post with the original HERE.  Imagine my surprise when on Monday she revealed another little house that she had made just for me, wow!! I cannot believe how lucky I am, the detail is amazing - take a look for yourself ......
 
 
Its hard to believe that it all started with a few atb die cuts, Anne really is the queen of 3d projects with these Eileen Hull dies
 
 
Anne hand cut all the little windows and to give them a much more authentic look, even placed sequin waste behind the acetate to get the honeycomb pattern older houses have.
 
 
The deco-art textured walls look like so real 
 
 
Even the door had a little star cut into it and then it was dressed with a lovely Christmas wreath
 
 
The stag and sleigh have been cut with shrink plastic and coloured with alcohol inks before shrinking down. Oh yes and one more thing
 
 
This beautiful house lights up, how special does this look?? - Amazing.
THANK YOU ANNE XXX
And Thank you too for dropping by today for a little look.  I will be back soon with my December Tim tag and completed atc board, hope you can join me again then.
Bye Bye for now
Mo xx


Saturday 29 November 2014

November Tag

Hi Everyone,

I am taking a little break with my blog at the moment thus the lack of posts recently, but wanted to keep up with my Tim's tags for 2014 as we only have 2 more to go.  Tim's original tag can be found HERE and below is my take on it.


The techniques that Tim gave us were followed fairly closely, only changing the dies and the colours as I like to be a little different.  The background was spritzed with Evergreen bough, peeled paint and white paints followed by a run through the big shot using the waves embossing folder which had been inked with Salty Ocean.  Sticky embossing powder through the speckles stencil and a rub of copper foil sheet over it completed the background.


the corrugated cardboard was cut with the noel and tree movers and shapers and then I rubbed it over with vintage photo distress ink followed by broken china, salty ocean, picket fence and antiqued bronze distress spray.  I went around the edges of the Noel and the tree with black to make it stand out a little more.


I decided to use the cut out tree with the same colours and put it alongside the cut out tree, the stars are remnant rubs dotted in the centre with a little antiqued bronze paint, the arrow also had a little dab of the same to blend it in with the copper in the background.


A little antique ribbon on the top coloured with evergreen bough and antiqued bronze plus some linen ribbon on the bottom secured with my tiny attacher and my tag was done.


Thank you for dropping by whatever you are doing this weekend, have fun.
Mo x

Thursday 9 October 2014

October Tag Boo!

Hi Everyone,

I am early for once with my October Tag entry for the Tim Holtz Challenge this month, and I have to say I really enjoyed my little self playing with my new crafty favourite the Ranger Distress Sprays.  I have stuck fairly close to Tim's idea this month  which you can see by clicking HERE along with his brilliant step by step tutorial for all the techniques.


As you can see I have used his new Spooky cat stamp instead of the Pumpkin, I just love the mischievous look in his eyes and that spider better watch out as I am sure he has been spotted!.
 
I do not have Tim's Spider stamp so I used my Indigo Blu one to stamp and emboss before using the speckles stencil with the texture paste.  I used the same colour sprays as Tim did ie Dusty Concorde, Spiced Marmalade and Crushed Olive on the background, and then finished off with a spritz of Brushed Pewter to give it sparkle.  
 
 
The Vintage ribbon on the top of the tag was coloured using the same distress sprays and then plaited as shown.  The 31 brad was coloured with a little crushed olive paint.
 
The cat itself was coloured using a mix of Crushed Olive, and mowed lawn distress pens and blended with the watercolour pen before being covered with glossy accents.
The photo below shows the glossy accents up really well on the cat and the letters were decorated in each corner with a small black embellishment which had a tiny blob of Brushed pewter paint rubbed on top of each to add interest.  You can see the spritz of black sharpie pen on the letters quite well here too.
 
 
As I did not have any of the black tinsel Tim used in my stash, I used a black soot distress spray to colour a piece of linen ribbon, then again a little tickle of Pewter DP to highlight it.  This was attached with my tiny attacher and the staples blackened with sharpie as Tim showed us.


My matching atc this month was completed in the same way as the tag but using the shatter stencil instead of the speckles.


I used black soot spray over spiced marmalade and crushed olive and by drying and spritzing with water and a little more black, it enabled me to get the black into the cracks, I think it looks pretty cool.


Thanks for dropping by today
Crafty Hugs
Mo x


Tuesday 30 September 2014

September Tag Gathering Leaves

Hi Everyone,

It has been very quiet on my blog in the last couple of weeks as I have a new member of the family that has been demanding my attention, more about him later.

I am showcasing my September tag today the step by step instructions as always have been given by Tim Holtz on his blog and can be found by clicking on the link HERE.  I must say I found this tag the hardest so far this year.  Firstly I don't do faces so nothing in my collection remotely matched the one Tim did, I like to be different so this was not the main problem.  I did however have a huge problem actually getting this technique to work and look good on the background, especially with a light alcohol ink, and reading through the blogs I am not the only one who has to have about 10 goes to get a decent result.  I found that using two different alcohol inks (Stonewashed and Shell Pink)made the resist pop out better so this is what I have gone with in the end.

 
As you can see I have used one of my favourite of Tim's stencils (Latticework) to get the background. The lovely new broom stamp was very kindly loaned to me from my wonderful best friend ANNE  and she has not even had chance to use it herself yet so I will be rushing this straight back to her this week.  A few remnant rubs were added around the stamped areas.


The twigs for the broom and the leaves were coloured and stamped as Tim shows on his blog and they were cut from the Autumn Gatherings Decorative strip.
 
 
The twigs were layered up and I wrapped twine around two small pieces of card to act as the ties.
 
 
Further leaves were glued at the top of the tag to decorate the linen ribbon.
 

I mounted it onto a black tag and it was done. 
 
Now  remember I mentioned the addition to the family?? well here he is
 
 
His name is Georgie and he is a 6 year old Cavapom (Pomeranian and King Charles Spaniel x)
He is a rescue so need plenty of love and attention at the moment but he is very affectionate and loves nothing better than loads of cuddles and walks.
As he settles down into his new surroundings I should be able to get back to a little more crafting and blogging again as I know I have plenty of catching up to do with everyone.
 
Thank you for dropping in today and I hope to get around to visit everyone soon.
 
Mo xx 


Friday 12 September 2014

A Vintage Journey Guest Design Spot

Hi Everyone

Thank you so much for taking the time to drop in
Once again I have been very honoured to have been asked by the team to be Guest designer over at
A Vintage Journey. It is Jennie's turn from Live The Dream to host the latest challenge and the theme she has chosen is With a Flourish. Now I don't have any problem at all finding ways of using flourishes in my work as they are so perfect for subtle stamped backgrounds or as die cuts in the foreground to create a feature. I chose to create a card this time pictured below. You can find more pictures of the finished project plus a few close ups by visiting A Vintage Journey and I have given a quick tutorial below. 


Firstly I made a 6" x 6" base card from 300gsm white card stock and placed my cabinet M/S die face down centrally on the card and placing the magnetic base plate over the top to run it through (so effectively upside down to how we would normally do it) this is just so you can get it central

Next I used a piece of cut n dry to apply  picket fence distress paint to an Indigo Blu Vintage Flourish stamp and stamped randomly all over one side of the card, re applying the paint for each flourish.  I dried with a heat gun and repeated this step on the other side. I blended Shabby shutters, Tattered rose and Victorian Velvet Distress inks all over both sides of the stamped card and the distress paint resisted the ink giving a lovely soft effect, then I used the same stamp and the Victorian Velvet distress ink to stamp over again giving a darker layer of flourishes.


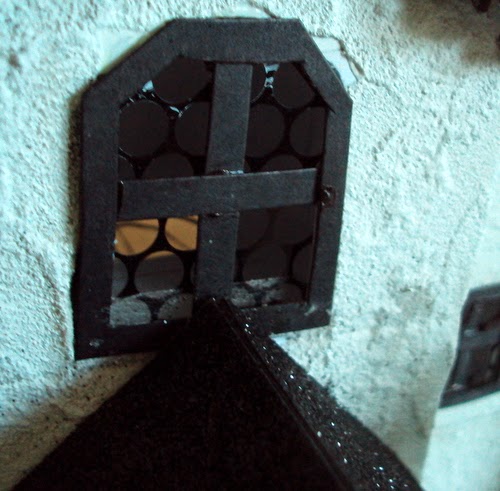
I die cut 3 frames for the apertures using the m/s die together with the bigz cabinet card die and painted them with pumice stone distress paint. Whilst the paint was still wet, I sprinkled pumice stone distress embossing powder over and heat embossed. I mixed some white texture paste with pumice stone paint and used it through the speckles stencil to get even more texture on the frames and give them a stone look.


I inked the edges of the frames and glued one on the front, the second on the inside left back to back with the front one and the third I glued onto a found relative card and trimmed to fit.


To get the frames lined up correctly I added glue to the back of the found relative frame, placed it directly on top of one on the inside left, and shut the card.

I die cut 4 vintage flourishes and painted with tattered rose distress paint, sprinkled distress embossing powder over as earlier but this time using a mix of pumice stone, vintage photo and antique linen. (note: as these are placed back to back, you need to do 2 on the right side, and 2 on the wrong side) the photo does not show this - schoolgirl error!


The sentiment is an adage ticket spritzed with water, screwed up tight dried opened up and inked and stamped with the sentiment on the back. The little tea roses were all made using the bigz tattered pine cone die and inked up using tattered rose, Victorian velvet and scattered straw.


A tutorial by Tim himself can be found on This link for the making up the pine cones, the roses are done in the same way but keeping them more in line on the top and curling the edges with a poky tool rather than just creasing them. If you have Tim's Compendium of curiosities book 3 the faux tea roses are on page 65.  I made a few as I could not decide how many I would use on the final layout.


The leaves were left over from my bursting flower box project and I gave a detailed how to on that post, you can find it on the link Here.

All that remained then was to put it all together, with the addition of a wishbone which I drilled a small hole into the top to take a ring pull and a small linen ribbon bow the card was complete.


There is still a whole week to enter their current challenge. In Jennie's own words, this is what she is looking for in your entries.
' Have you ever noticed that much of Tim's packaging includes that fabulous flourish? It has always been one of my favourite Tim images, so for this challenge let's see what you can do with your flourishes! You might not have the "actual" Tim flourish but I am sure everyone has a flourish die or stamp in their stash which can get the shabby/vintage treatment.
Our challenge runs for two weeks and then a winner will be chosen by the team. The winner will receive a £10 shopping voucher from our host Country View Crafts on-line shop. We shall also be choosing three blog badge winners, our "Pinworthies" who will be pinned to our special winners Pinterest Board.'
I also have the lucky winners of my atc's from my Tiny Things post picked out by my hubby Alan randomly
The winner of my arrows set is Julie  http://julizdesignpost.blogspot.co.uk/
The winner of the Butterfly/Dragonfly set is Rita http://rmgcreations.blogspot.co.uk/
Congratulations to both winners please email me your contact details so I can get them in the post to you. Thank you also to everyone for your lovely comments

I do hope I have inspired you to have a play with some of the techniques.
Mo x